
📚 목차
🧩 보안 구성
OAuth2
- 토큰 기반의 인증 및 권한 부여 프로토콜
- 클라이언트 애플리케이션이 리소스 소유자의 권한을 얻어 보호된 리소스에 접근할 수 있도록 함
- 리소스 소유자, 클라이언트, 리소스 서버, 인증 서버의 역할을 정의함
JWT
- JSON 형식의 자가 포함된 토큰
- 클레임(claim)을 포함하여 사용자에 대한 정보를 전달함
- 헤더, 페이로드, 서명으로 구성됨
- 암호화를 통해 데이터의 무결성과 출처를 보장함
- 특징: 자가 포함, 간결성, 서명 및 암호화
인증 실습

- [auth] 프로젝트 생성


- [auth]
build.gradle- 강의자료에는
implementation 'io.jsonwebtoken:jjwt:0.12.6'만 적혀 있는데, 3개 다 추가해야 빌드가 된다.
- 강의자료에는
implementation 'io.jsonwebtoken:jjwt-api:0.12.6'
runtimeOnly 'io.jsonwebtoken:jjwt-impl:0.12.6'
runtimeOnly 'io.jsonwebtoken:jjwt-jackson:0.12.6'- [auth]
application.yml생성
spring:
  application:
    name: auth-service

eureka:
  client:
    service-url:
      defaultZone: http://localhost:19090/eureka/

jwt:
  secret: "${JWT_SECRET}"
  access-token:
    expiration: 3600000

server:
port: 19095- [auth]
AuthConfig생성/auth/signIn경로는 인증 없이 접근 가능- 그 외의 모든 요청은 인증이 필요함
STATELESS: 세션을 사용하지 않음
package com.sparta.eureka.client.auth;

import org.springframework.context.annotation.Bean;
import org.springframework.context.annotation.Configuration;
import org.springframework.security.config.annotation.web.builders.HttpSecurity;
import org.springframework.security.config.annotation.web.configuration.EnableWebSecurity;
import org.springframework.security.config.http.SessionCreationPolicy;
import org.springframework.security.web.SecurityFilterChain;

@Configuration
@EnableWebSecurity
public class AuthConfig {

    @Bean
    public SecurityFilterChain securityFilterChain(HttpSecurity http) throws Exception {
        http
                .csrf(csrf -> csrf.disable())
                .authorizeHttpRequests(authorize -> authorize
                        .requestMatchers("/auth/signIn").permitAll()
                        .anyRequest().authenticated()
                )
                .sessionManagement(session -> session
                        .sessionCreationPolicy(SessionCreationPolicy.STATELESS)
                );

        return http.build();
    }
}- [auth]
AuthService생성
@Service
public class AuthService {

    @Value("${spring.application.name}")
    private String issuer;

    @Value("${jwt.access-token.expiration}")
    private Long accessExpiration;

    private final SecretKey secretKey;

    public AuthService(@Value("${jwt.secret}") String secretKey) {
        this.secretKey = Keys.hmacShaKeyFor(Decoders.BASE64URL.decode(secretKey));
    }

    public String createAccessToken(String user_id) {
        return Jwts.builder()
                .claim("user_id", user_id)
                .claim("role", "ADMIN")
                .issuer(issuer)
                .issuedAt(new Date(System.currentTimeMillis()))
                .expiration(new Date(System.currentTimeMillis() + accessExpiration))
                .signWith(secretKey, Jwts.SIG.HS512)
                .compact();
    }
}- [gateway]
build.gradle: JWT 의존성 추가 추가 - [gateway]
application.yml수정
server:
  port: 19091

spring:
  application:
    name: gateway-service
  cloud:
    gateway:
      server:
        webflux:
          routes:
            - id: order-service
              uri: lb://order-service
              predicates:
                - Path=/order/**
            - id: product-service
              uri: lb://product-service
              predicates:
                - Path=/product/**
            - id: auth-service
              uri: lb://auth-service
              predicates:
                  - Path=/auth/signIn
          discovery:
            locator:
              enabled: true

eureka:
  client:
    service-url:
      defaultZone: http://localhost:19090/eureka/

jwt: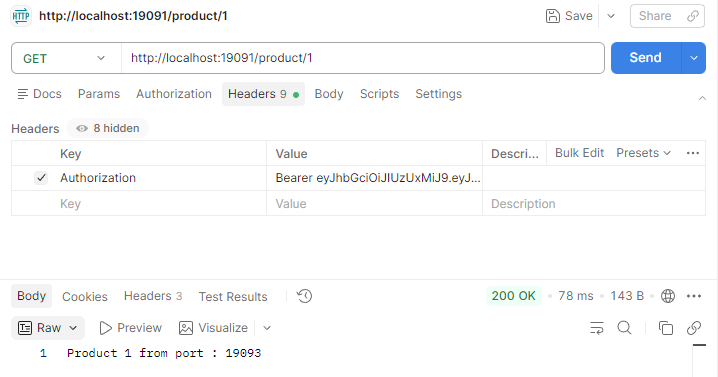
secret: "${JWT_SECRET}"- [gateway]
LocalJwtAuthenticationFilter생성
@Slf4j
@Component
public class LocalJwtAuthenticationFilter implements GlobalFilter {

    @Value("${jwt.secret}")
    private String secretKey;

    @Override
    public Mono<Void> filter(ServerWebExchange exchange, GatewayFilterChain chain) {
        String path = exchange.getRequest().getURI().getPath();
        if (path.equals("/auth/signIn")) {
            return chain.filter(exchange);
        }

        String token = extractToken(exchange);

        if (token == null || !validateToken(token)) {
            exchange.getResponse().setStatusCode(HttpStatus.UNAUTHORIZED);
            return exchange.getResponse().setComplete();
        }

        return chain.filter(exchange);
    }

    private String extractToken(ServerWebExchange exchange) {
        String authHeader = exchange.getRequest().getHeaders().getFirst("Authorization");
        if (authHeader != null && authHeader.startsWith("Bearer ")) {
            return authHeader.substring(7);
        }
        return null;
    }

    private boolean validateToken(String token) {
        try {
            SecretKey key = Keys.hmacShaKeyFor(Decoders.BASE64URL.decode(secretKey));
            Jws<Claims> claimsJws = Jwts.parser()
                    .verifyWith(key)
                    .build().parseSignedClaims(token);
            log.info("#####payload :: " + claimsJws.getPayload().toString());
            return true;
        } catch (Exception e) {
            return false;
        }
    }
}


🧩 Config란?
Spring Cloud Config
- 분산 시스템 환경에서 중앙 집중식 구성 관리를 제공하는 프레임워크
- 애플리케이션의 설정을 중앙에서 관리하고, 변경 사항을 실시간으로 반영 가능
- Git, 파일 시스템, JDBC 등 다양한 저장소를 지원함
- 주요 기능
- 중앙 집중식 구성 관리: 모든 마이크로서비스의 설정을 중앙에서 관리함
- 환경별 구성: 개발, 테스트, 운영 등 환경별로 구성을 분리하여 관리 가능
- 실시간 구성 변경: 설정 변경 시 애플리케이션을 재시작하지 않고도 실시간으로 반영 가능
실시간 구성 변경
- Spring Cloud Bus
- 설정 변경 사항을 실시간으로 클라이언트 애플리케이션에 반영 가능함
- RabbitMQ나 Kafka 같은 메시징 시스템을 사용해 변경 사항을 전파해야 함
- 수동 구성 갱신:
/actuator/refresh엔드포인트 사용 또는 Spring Boot DevTools 사용 - Git 저장소 사용: Spring Cloud Config 서버가 Git 저장소에서 설정 파일을 읽어오도록 설정할 수 있음
Spring Cloud Config 실습하기

Config 서버를 생성하고 연결하면 product 애플리케이션이 로컬에서 동작할 때 포트 정보 및 메시지를 Config 서버에서 가져오게 된다.
💡 현업에서는 직접 Config 서버를 구현하기 보다는 이미 구축된 Config 서버를 연동해서 사용하는 것이 일반적이라고 한다.
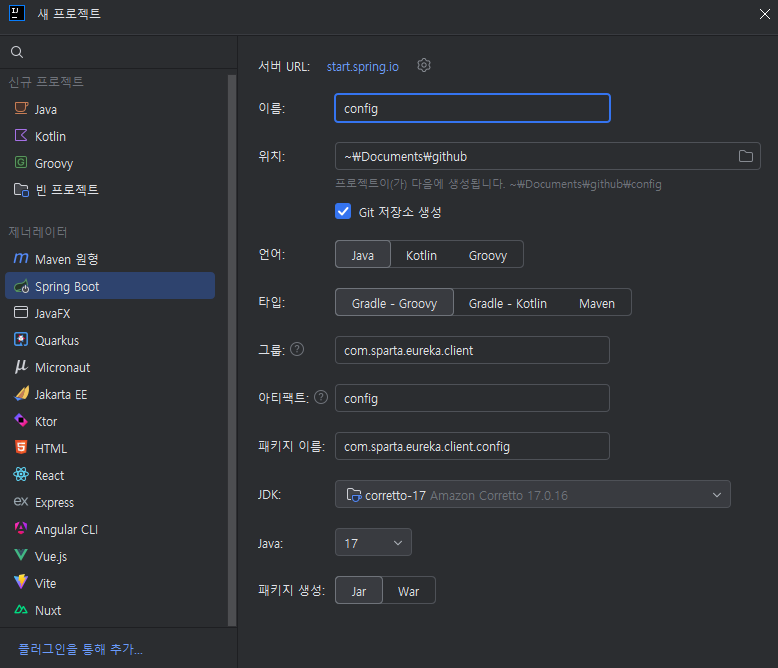
- [config] 프로젝트 생성하기

- [config]
ConfigApplication:@EnableConfigServer어노테이션 추가 - [config]
application.yml생성
server:
  port: 18080

spring:
  profiles:
    active: native
  application:
    name: config-server
  cloud:
    config:
      server:
        native:
          search-locations: file:./config-repo

eureka:
  client:
    service-url:
defaultZone: http://localhost:19090/eureka/- [config]
config-repo/product-service.yml생성
server:
  port: 19093

message: "product-service message"- [config] config-repo/product-service-local.yml 생성
server:
  port: 19083

message: "product-service-local message"- [product]
build.gradle:implementation 'org.springframework.cloud:spring-cloud-starter-config'추가 - [product]
application.yml수정server.port: 0은 임시 값이며, 이후 Config 서버 설정으로 덮어 씌워진다.
server:
  port: 0

spring:
  profiles:
    active: local
  application:
    name: product-service
  config:
    import: "configserver:"
  cloud:
    config:
      discovery:
        enabled: true
        service-id: config-server

management:
  endpoints:
    web:
      exposure:
        include: refresh

eureka:
  client:
    service-url:
      defaultZone: http://localhost:19090/eureka/

message: "default message"- [product]
ProductController수정@RefreshScope:/actuator/refresh엔드포인트를 호출하여 설정 변경 사항을 동적으로 반영 가능함
@RefreshScope
@RestController
@RequestMapping("/product")
public class ProductController {

    @Value("${server.port}")
    private String serverPort;

    @Value("${message}")
    private String message;

    @GetMapping
    public String getProduct() {
        return "Product detail from PORT : " + serverPort + " and message : " + this.message ;
    }
}
- Eureka > Config > Product 순으로 서버를 실행한다.
- 이전에
ProductApplication에 설정했던 VM 설정은 지워야 한다.
- 이전에

Caused by: org.springframework.web.client.ResourceAccessException: I/O error on GET request for "http://localhost:8888/product-service/default": Connection refused: getsockopt
로그를 보면 포트 8888로 연결을 시도했다가 실패했다고 나와 있다. spring.config.import=optional:configserver: 가 기본적으로 http://localhost:8888로 연결하기 때문에 (참고) 아래와 같이 수정해야 한다.
- [product]
application.yml수정
spring:
  profiles:
    active: local
  application:
    name: product-service
  config:
    import: "configserver:http://localhost:18080" # ← 수정
  cloud:
    config:
      discovery:
enabled: falsehttp://localhost:18080/product-service/default에 접속했을 때 아래처럼 나오면 된다.
{
    name: "product-service",
    profiles: [
    	"default"
    ],
    label: null,
    version: null,
    state: null,
    propertySources: [
        {
            name: "classpath:/config-repo/product-service.yml",
            source: {
                server.port: 19093,
                message: "product-service message"
            }
        }
    ]
}

다음으로 메시지 업데이트 테스트를 진행해보자.
- [config]
product-service-local.yml수정 후ConfigApplication재시작
server:
  port: 19083

message: "product-service-local message 안녕하세요"- POST
/actuator/refresh


🧩 분산 추적이란?
분산 추적
- 분산 시스템에서 서비스 간의 요청 흐름을 추적하고 모니터링하는 방법
- 각 서비스의 호출 관계와 성능을 시각화하여 문제를 진단하고 해결 가능함
- 주요 개념
- 트레이스: 하나의 요청이 시작부터 끝까지 각 서비스를 거치는 전체 흐름
- 스팬: 분산 추적에서 가장 작은 단위. 특정 서비스 내에서의 개별 작업 또는 요청
- 컨텍스트: 요청이 서비스 간에 전달될 때 함께 전파되어 각 서비스가 요청의 전체 흐름에 대한 정보
- 분산 추적이 필요한 이유
- MSA에서는 여러 서비스가 협력하여 하나의 요청을 처리함
- 서비스 간의 복잡한 호출 관계로 인해 문제 발생 시 원인을 파악하기 어려울 수 있음
- 분산 추적을 통해 각 서비스의 호출 흐름을 명확히 파악하고, 성능 병목이나 오류를 빠르게 진단할 수 있음
MicroMeter
- Spring 기반 애플리케이션에서 메트릭을 수집하고 모니터링하기 위한 라이브러리
- 각 서비스의 성능 지표를 수집하고, Prometheus, Grafana 등과 연동하여 시각화
- 분산 추적을 위한 기능도 제공하여 서비스 간의 호출 흐름 추적
- 특징: 다양한 메트릭 수집, 유연한 연동, 추적 기능
Zipkin
- 트레이스 데이터를 수집하고 시각화하는 분산 추적 시스템
- 각 서비스의 트레이스와 스팬 데이터를 저장하고, 이를 통해 호출 흐름을 시각화
- 특징: 데이터 수집 및 저장, 시각화, 검색 및 필터링
- Zipkin 서버 실행: Docker를 사용해서 실행한다.
docker run -d -p 9411:9411 openzipkin/zipkin- Zipkin 대시보드:
http://localhost:9411
분산 추적 예제
- 서비스 호출 흐름 추적
- 예제 서비스 간의 호출 흐름을 추적하고, Zipkin 대시보드에서 시각화한다.
- 각 서비스 호출 시 트레이스와 스팬이 생성되고, Zipkin 서버로 전송된다.
- 성능 병목 진단
- Zipkin 대시보드를 통해 성능 병목이 발생하는 부분을 식별한다.
- 각 스팬의 소요 시간과 호출 관계를 분석하여 성능 문제를 진단하고 해결한다.
분산 추적 실습하기
- [product][order]
build.gradle에 아래 의존성 추가
implementation 'io.micrometer:micrometer-tracing-bridge-brave'
implementation 'io.github.openfeign:feign-micrometer'
implementation 'io.zipkin.reporter2:zipkin-reporter-brave'- [product][order]
application.yml수정
management:
  zipkin:
    tracing:
      endpoint: "http://localhost:9411/api/v2/spans"
  tracing:
    sampling:
probability: 1.0- Docker 설치 (참고)
- Zipkin Docker 컨테이너 실행
▼ 더보기docker run -d -p 9411:9411 openzipkin/zipkin
에러가 발생했다??? # 실패한 컨테이너 흔적 지우기 docker ps -a docker rm -f ...- 9411 포트가 사용 중인지 확인했지만 사용 중이 아니었다.
netstat -aon | findstr :9411- WSL 종료 및 Docker Desktop 종료 후 재시작
wsl --shutdown- WSL 상태 확인
wsl -l -v wsl -d docker-desktop echo WSL 2 is working- 이렇게 했는데도 실패해서 다른 호스트 포트로 테스트했더니 드디어 성공했다.
docker run -d --name zipkin -p 19411:9411 openzipkin/zipkin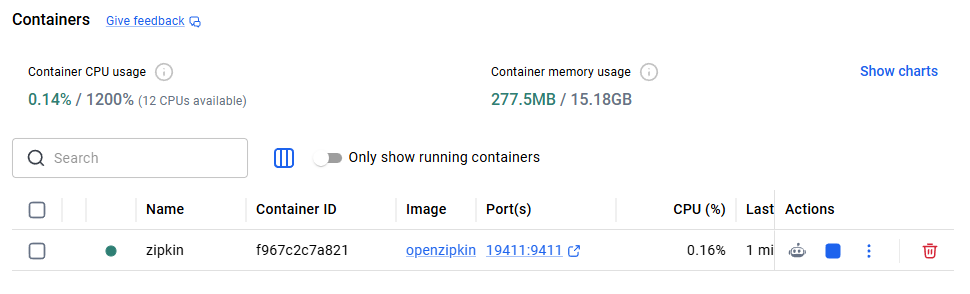
- 포트를 19411로 열었으므로
application.yml도 맞춰서 수정해야 한다.
management: zipkin: tracing: endpoint: "http://localhost:19411/api/v2/spans" - Eureka > Order > Product 순으로 서버 실행
http://localhost:19411/zipkin/에서 Zipkin 대시보드 확인 가능- RUN QUERY > Spans 3 > SHOW 클릭

🧩 이벤트 드리븐이란?
이벤트 드리븐 아키텍처
- 시스템에서 발생하는 이벤트(상태 변화나 행동)를 기반으로 동작하는 소프트웨어 설계 스타일
- 이벤트는 비동기적으로 처리되며 서비스 간의 느슨한 결합을 통해 독립적으로 동작할 수 있게 한다.
- 주요 개념
- 이벤트: 시스템 내에서 발생하는 상태 변화나 행동을 나타내는 메시지
- 이벤트 소스: 이벤트를 생성하여 이벤트 버스에 전달하는 역할
- 이벤트 핸들러: 이벤트를 수신하여 처리하는 역할
- 이벤트 버스: 이벤트 소스와 이벤트 핸들러 간의 메시지 전달을 중개
- 장점
- 느슨한 결합: 서비스 간 결합도를 낮추고 강한 종속성을 제거해 독립적인 개발/배포 가능
- 확장성: 이벤트 프로듀서와 컨슈머를 독립적으로 확장 가능
- 비동기 처리: 시스템 응답성 향상 및 성능 최적화
- 단점
- 복잡성 증가
- 장애 전파
- 예시 - 온라인 쇼핑몰
- 이벤트 소스: 사용자가 주문을 한다. → 주문 서비스가
주문 생성이벤트를 발생시킨다. - 이벤트 버스: Kafka나 RabbitMQ 같은 메시지 브로커가
주문 생성이벤트를 전달한다. - 이벤트 핸들러
- 재고 서비스:
주문 생성이벤트를 수신하여 재고를 확인하고 업데이트한다. - 배송 서비스:
주문 생성이벤트를 수신하여 배송 준비를 시작한다. - 결제 서비스:
주문 생성이벤트를 수신하여 결제 처리를 한다.
- 재고 서비스:
- 이벤트 소스: 사용자가 주문을 한다. → 주문 서비스가
Spring Cloud Stream
- 이벤트 드리븐 MSA를 구축하기 위한 프레임워크
- Kafka, RabbitMQ 등의 메시지 브로커와 통합하여 이벤트 스트리밍을 처리함
- 프로듀서와 컨슈머 간의 통신을 추상화하여 간편하게 이벤트 기반 애플리케이션 개발 가능
- 특징: 바인더 추상화, 프로듀서/컨슈머 모델, 유연한 설정
'내일배움캠프' 카테고리의 다른 글
| [내일배움캠프] MSA 마무리 (0) | 2026.04.15 |
|---|---|
| [내일배움캠프] Windows에서 Docker 설치하기 (1) | 2026.04.14 |
| [내일배움캠프] 서비스 디스커버리, 로드 밸런싱, 서킷 브레이커, API 게이트웨이 (0) | 2026.04.13 |
| [내일배움캠프] MSA와 Spring Cloud (0) | 2026.04.11 |
| [내일배움캠프] 예외 처리 (0) | 2026.04.10 |